Tuesday, June 4, 2013

SpringSummer

That was a fabulous 20-minute Spring we had there, with little bursts of winter and summer intermingled!  Here in Georgia my pansies are usually done for by mid-March, at which point it gets too hot.

Nuh-uh.  I ripped their thriving selves out of the ground in late May.  I mean, I've killed lots of plants in my day, but never on purpose.  And oddly, the geraniums I planted two years ago (that never bloomed) and the dwarf hydrangea I planted three years ago (that never bloomed) are ALL BLOOMING.  Maybe my Darwinian approach to gardening - hey, if you can tough it out then you can stay - works.  Eventually.

So I could make all kinds of excuses about why I haven't been cooking or posting or whatever, but I'm tired of everyone else's excuses so I should extend the ban to myself.  This Asparagus-Ricotta Tart is really more of a crustless quiche; there's no tart pan necessary, no dough, no problem just using a skillet.

I do have to recommend Calabro ricotta cheese if you can find it.  It is far superior to any of the mass-market brands (sorry, stuff in the red tub).  Since there are only a few ingredients in this dish, they all have to be high quality.

From Good Housekeeping.  Go figure.  This makes a terrific brunch dish, especially with a side of cantaloupe.  I've also brought it to work, with a spinach-strawberry salad, for lunch.

Understand that there is ONE step to the directions.  This is my kind of recipe.  And I would even say that if you have a 9-inch round cake pan, that would be fine to use instead of the skillet.  Either way, give it a good coating of cooking spray.

Asparagus Ricotta Tart
Good Housekeeping

Ingredients
  • 15 ounce(s) ricotta cheese (I used Calabro part-skim.  Because it's awesome.)
  •  4 large eggs (I used 3 eggs and 2 egg whites, for calorie purposes)      
  • 1/4 cup(s) freshly grated Parmesan cheese (FRESHLY GRATED.  If all you have is the Kraft green can stuff then make something else for dinner.  Sorry.)      
  • 1/4 cup(s) milk  (I didn't have any!  I used about 2 TBSP of water.  If I'd had sour cream I would've thrown a dollop in a 1/4 cup measure and thinned it with water.  If you try that, please let me know how it turns out.)
  • 3 tablespoon(s) snipped chives (Didn't have any of those, either.  I used about 2 TBSP of fresh thyme from my garden, and 1 thinly chopped green onion ALSO from my garden).
  • 1/4 teaspoon(s) salt (Whatever.  No one measures this.)
  • 1/4 teaspoon(s) pepper (Or this.)
  • Asparagus spears, trimmed to fit (8 to 12 spears should do it)   
  • Some diced ham would also be very tasty in here; call it 1/4 cup.   

Directions
  1. Mix first seven ingredients together and pour mixture into 10-inch nonstick oven-safe skillet; top with asparagus spears and bake in 375 degrees F oven for 40 minutes.


Sunday, November 18, 2012

Streamlining Thanksgiving

My Italian grandparents used to have a seven-course Thanksgiving and honestly, even typing out the menu makes me tired.  If you've got time to cook seven courses and yoga pants are welcome at your dining room table, more power to you.  That's not the case in our house.

Lots of things can affect the time you have available on Thanksgiving Day - refereeing kids, work, parades, elderly guests who require care, football games that may cause the earth to fall off its axis.  Whether you yourself are squeezing in the cooking around other activities or if a guest is pulling it together for you (some guests help and some guests "help" - choose the former), there are ways to make this a LOT easier on yourself.

1.  Streamline the menu.  Do you need 4 desserts?  If not, keep the top two favorites and eliminate the rest.  Quality vanilla ice cream with store-bought gingersnaps also makes a lovely dessert and couldn't possibly be easier.

2.  Pre-cook anything that can be pre-cooked.  Do you need rice for rice stuffing?  Make it a day or two before.  Making cranberry applesauce?  You can make that a week ahead of time and store it in the fridge - it'll be fine.  Baking bread?  For heaven's sake don't do it on Thanksgiving Day when your turkey takes up all the oven real estate.  That's just madness.

3.  Embrace the Ziploc and the Sharpie!  I can't emphasize this enough.  If you need diced onions, then dice what you need early and seal them in Ziploc.  If you need, say, a half-cup for gravy and a full cup for a casserole, put them in separate Ziploc bags and label them with the Sharpie - "1/2 cup, gravy" and "1 cup, squash casserole."  The reason will become apparent in #4.

Herbs and spices can also be measured, combined, baggied, and labelled.  This really ends up being a timesaver, and it's something I do just for cooking on weeknights when I come home from work.

Foods that can be sliced & diced early:
  • Carrots
  • Celery
  • Onion
  • Broccoli
  • Some squashes - not yellow/summer/crookneck squash or zucchini - if you're going to store it as-is.  If you're slicing and combining into a casserole to be baked later, it's fine.
  • Peppers

4.  Group it all together.  This is especially key if someone unfamiliar with your kitchen will be cooking with or for you.

Put the ingredients, a copy of the recipe, and any specialized utensils (e.g. a whisk) together in the saucepan, baking pan, serving bowl, whatever.  That way nearly everything needed for that dish is ready to go.

For example:  Let's say Butternut Squash Souffle is on your holiday menu.
  • You can pre-cook the squash, puree it (without the eggs), and store the puree in the fridge. 
  • Combine the sugar, sage, baking powder, salt, and nutmeg in a labelled baggie.
  • In the baking dish or mixing bowl, put a copy of the recipe, the puree, 3 eggs, the baggie, the wrapped half-stick of butter, the beaters for the mixer, and the tub of sour cream so that they are grouped together.  Store in the fridge.
We're having a drop-in Thanksgiving - whenever you get there, grab a plate and enjoy.  Things I'm doing in advance include making the herb butter to rub under the turkey skin, making cranberry applesauce, assembling green bean casserole, and making coconut cream pie.  The mashed potatoes and gravy, in my opinion, really need to be done on Thanksgiving day.

If all else fails serve copious amounts of wine and/or claim that you always said it would just be a dessert buffet.  Feign surprise that anyone expected an entree and offer cheese and crackers to be nice.

Happy Thanksgiving!


Monday, August 20, 2012

"What Can I Bring?"

We invited our niece and her Dad over for dinner.  Demonstrating that a) she knows Aunt Steph loves when she says that and b) this process is easier now that we have matching Girl Scout cookbooks, Cutie asked what she could make.

Usually I prefer to do the food myself - when I invite folks over, it's to have fun and great conversation

[Note: This rule is suspended for holidays, in which case you are welcome to bring a stuffed turkey, squash casserole for 12, or the pumpkin cheesecake that I can never get quite right but maybe you have a knack for it... ?]

But when the offer is from a kid who's going places with this "cooking" thing, it's a yes.  Always.

Since we were having grilled chicken I flipped through the award-winning, on-all-the-talk-shows Girl Scout cookbook and picked out a few side dish recipes for her to choose from.

The watermelon salad was fabulous, and she did an A+ job on presentation.  It could easily have been on a magazine cover as an example of summer yumminess - broad lettuce leaves lining the platter, watermelon and onion as the next layer, and feta cheese scattered prettily on top. 

But even better was hearing all about how her year in sixth grade is shaping up.  I sometimes can't believe how lucky I am to have two nieces and three nephews with such sweet, vibrant, funny personalities.

And that's worth saying a blessing over.

Watermelon Salad with Balsamic Vinaigrette
Carleigh & Lorrie, local Scout troop fundraising cookbook

Balsamic Vinaigrette (note:  this makes a lot.  When I make this I'm going to halve the dressing quantities).

1/2 cup balsamic vinegar
1/4 cup canola oil and 1/4 cup olive oil
1 Tablespoon Dijon mustard
1 Tablespoon honey
1 clove garlic, minced
salt & pepper to taste

Mix all, refrigerate until ready to serve.

Salad
1 medium seedless watermelon, cubed
1 red onion, thinly sliced
3/4 cup fresh mint, chopped (torn, or snipped with kitchen scissors, will work if a young cook doesn't use sharp knives yet)
8 ounces feta cheese, crumbled
[Cutie arranged all of this on a bed of dark green lettuce leaves.  Deelish!]

In a large bowl or serving platter combine watermelon, onion, mint and cheese.  Season with pepper.  Pour dressing over salad, or pass dressing at the table.

Saturday, July 28, 2012

Go Fish. No, YOU Go Fish.

It's summer, and the fish are leaping onto fishing boats (right?), and as I try to get the grief-weight off I'm eating a lot of it.

Grief is a weird thing.  It clobbers you over the head and renders you useless for a while, and everyone knows that's going to happen.  Then it eases off, and you're like "I'm so totally tough.  I GOT this."  And that's true - eventually - but being tough doesn't mean being heartless or soulless, and the grief gets sneaky and sticks its foot out in your path when you're walking in the supermarket.  It just happens.  And it throws you into the potato chip or ice cream aisles on general principle.

And thus, I have somewhere in the neighborhood of ten pounds that needs to go elsewhere.  I know, I know, it could be worse, but when you're short it's painfully and fluffily apparent.

Besides the weight issue, grief is exhausting.  DAMN.  Anything exhausting requires energy to get through, and you can't power "getting through" with curly fries (although they're a nice supplement).

Now that I'm trying to move voluntarily (Zumba, swimming, walking) and cut back on the fat/carb combos, fish recipes are some of my best friends.

And this is, kind of, part of a recipe.  I truly don't understand how tomatoes go with soy sauce and lemongrass.  I just don't.  And, having made it anyway, I have confirmed my position.  The next time I make this I'm leaving them out.  I made brown rice and some grilled veggies with this; some portobellos would be wonderful, as would sugar peas or garlic green beans.  [I just decided, when I wrote that, I'm totally making garlic green beans next time.]  As much as I love corn with grilled fish, I don't see it going with this recipe (especially with rice, unless you're going super-carby).

All that said, the flavor on this one is fantastic.  I was tempted to get more brown rice than my allotted 1/2 cup just to soak up the (plentiful) sauce.  I could also be tempted to drain the sauce into a hot skillet, after making the fish, to reduce to a tasty glaze.

We're totally happy with this dinner.  I did it on the grill but you can easily do this in the oven when snow is on the deck.

White Fish en Papillotte (or en Aluminum Foil, as I did it)
The Guilty Kitchen

2 large pieces of firm-fleshed white fish (I used orange roughy, but halibut or snapper would also be excellent)
2 pieces of cooking parchment or double-thickness aluminum foil
1 clove garlic, minced
1/2 stalk lemongrass, roughly chopped (do get real lemongrass if you can; it's a wonderfully delicate flavoring)
1/4 bunch of cilantro (I used parsley, because that's what I had)
2 TBSP sesame oil (a huge part of this dish's success)
1 tsp fish sauce
1 TBSP low-sodium soy sauce
12 grape tomatoes, halved.  Or just skip them entirely.
2 green onions (scallions), sliced

1.  Preheat oven to 400 degrees F, or get the grill going to medium heat with the lid closed.

2.  In a small bowl mix the garlic, lemongrass, cilantro/parsley, oil, fish sauce, and sodium sauce. 

3.  On parchment paper or foil, place fish skin down (if you're using halibut with skin).  Sprinkle green onions (and tomatoes, if using) over fish.  I also added some freshly-cracked black pepper.

4.  Pour sauce equally over both pieces of fish and seal all sides of the packet.

5.  If using the oven, place on a baking sheet and bake for 10 - 12 minutes (longer if you're using halibut, which is a little more dense and takes longer).  If grilling, place packets, seam side up, on the grill and check for done-ness at about 10 minutes.

Brace yourself - opening the packet at the table releases a really delicious-smelling steam and you might need a moment.

Tuesday, July 3, 2012

Class-y

I'm putting in a local (Atlanta) plug for the cooking class at DBA Barbecue, via Living Social.  And cooking classes in general, really - delectable nibbles, cocktails, AND recipes.  What's not to plug?

Early in our courtship Sweetie and I took a few cooking classes together at Cook's Warehouse.  Totally fun and we got to try things we never would have otherwise.  Did you know that if you make fava beans, it's imperative to invite a half-dozen friends over to shell/peel the damn things before cooking?  We learned that from an instructor who made sure he had half a dozen students around (paying, no less) to prep the fava beans.  We also learned fancy words like "concasse."  This is very different from the term "concuss", which I use a lot every day career-wise.

Anyway.

This being Sweetie's busy time of year - when he is a blur that streaks into the house and right back out with a freshly-charged camera battery - I went to the DBA class with a friend.  We both loved the idea of BBQ sauce-making and we each raised an eyebrow at the idea of moonshine-tasting.  I will say that the lemonade with blueberry moonshine was FABULOUS, but the rest of them I didn't taste.  Driving and all.  Low tolerance for straight liquor and all.  I have my limits.

My barbecue sauce is a tangy, not-too-sweet tomato-based sauce.  To the best of my recollection I used ketchup, molasses, vinegar, mustard powder, black pepper (quite a lot of it), chili powder, and Worcestershire sauce.  It was formulated using the classic dump-and-taste method.  I named mine "This Little Piggy."  My friend, a straightforward sort, named hers "Honey Mustard."

Note: the big takeaway from class was that liquid smoke must be used VEEEERRRRYYYY sparingly.  Like with an eyedropper.  They didn't even put it out for fear that people might go nutty with a quarter-tablespoon.

A few weeks ago I made an astoundingly pitiful effort at making smoked pork.  I announced to Sweetie this afternoon that I was trying again.  He promptly "remembered" a meeting across town and left.

Well, who's sorry NOW?  My smoked chicken and pork ROCKS.  And he's in the RAIN on the dangerous ROADS (I'm actually pretty uncomfortable with this and contemplating calling my Mom to ask her to speak soothingly to me because I don't want to call and distract him while he's driving...).  I'll post the info & pictures when I do this again and write down info and take pictures.  My tangy, not-sweet sauce ROCKS.  I seriously could not be happier with this deliciousness.

Happy 4th of July and God bless America!

Saturday, June 30, 2012

Hotter'n Georgia Asphalt

Y'ALL.

How easy is this?  And delicious.  And not making me tear my hear out in this 106-degree heat (I'm not kidding).

Surely you're wondering what we had for dinner last night, because everyone knows that's what blogs and Facebook are all about.  Maybe Pinterest, too, I have no idea.

Sandwiches.  No cooking in this house when it was 108 degrees.  ONE HUNDRED AND EIGHT.  Carrot sticks as a side dish?  You bet.

We like cooking nice dinners on the weekend.  Not sure if I mentioned this but it's crazy !#@ING hot right now.  Saturday is often fish night since I can get to the farmer's market where the fish are swimming and I don't have to catch them.

So the key here - since we're melting - was to do as little as possible with heat, and none of it in the house.  Ergo marinade + fish + fridge + outdoor grill.

I'm ever so relieved to say it's delicious.  It's moist and flavorful and I'm not going near that !@#$ing grill again until it gets below 100 but I'm glad I made the effort this evening.  Which is really saying something.

My side dish was zucchini, which I cut into spears, misted with cooking spray, and sprinkled with salt & pepper before putting it on the grill (on the lower-temp side).  If you have the energy, it's delicious with some grated Parmesan added after you remove it from the grill.

Marinated Fish Steaks
Better Homes & Gardens Cookbook

1 pound fresh or frozen salmon, swordfish, or halibut steaks, 1 inch thick (I used thick grouper filets)
1/2 teaspoon finely shredded lemon peel or lime peel (shred the rind from one lime or lemon, don't deal with measuring unless the voices in your head demand it be so)
1/4 cup lemon juice or lime juice (I juiced the lime I zested, then made up the difference with bottled lemon juice)
1 TBSP cooking oil
1 TBSP water
1 TBSP Worcestershire sauce (NOTE - check the label to see if it's gluten-free, if that's an issue for you)
1/2 tsp dried rosemary or thyme, crushed
1 clove garlic, minced

1.  Thaw fish, if frozen.  Rinse fish steaks, pat dry with paper towels.  Cut into 4 serving-size pieces, if necessary.

2.  For marinade, in a shallow dish combine lemon or lime peel, lemon or lime juice, oil, water, Worcestershire sauce, rosemary or thyme, and garlic.

3.  Add fish; turn to coat with marinade.  Cover and marinate at room temperature for 30 minutes (or in the fridge for 2 hours), turning the steaks occcasionally and enjoying the delightfully brisk air when opening the refrigerator door.

4.  Drain fish, reserving marinade.  Place fish on the greased unheated rack of a broiler pan.  Broil 4 inches from the heat for 5 minutes.  Using a wide spatula, carefully turn fish over.  Brush with marinade.  Broil for 3 to 7 minutes more or till fish flakes easily with a fork.  Discard any remaining marinade.

OR

4.  Drain fish, reserving marinade (I simply lift it out of the dish with a slotted spatula and let the marinade drip back into the dish).  Oil grates of grill and preheat to medium heat.  Grill for 5-ish minutes.  Carefully flip fish, brush with remaining marinade.  Cook until done, which is very helpful as directions go.  If you're not an experienced griller of fish, hang near the grill and check frequently.

Wednesday, June 6, 2012

In Progress, and Lookin' Good

A lot of people say they want to like tofu, and they can't pull it off.  I get it.  I'm the same way about sushi (it's the seaweed).  And the ways some super-enthusiasts think they can disguise soft tofu (in cheesecake?  Seriously???) can be jaw-dropping.

So for extra-firm tofu lovers, here you go.  Eating Well's Soy-Lime Roasted Tofu, with brown rice, toasted unsalted peanuts, and veggies (broccoli, red pepper, sauteed mushrooms) is my lunch this week and I'm quite enjoying it.

That said, I'd enjoy it much more with some kind of sauce.  I'm absolutely open to suggestions.  I'm.   trying to limit processed foods, so I don't want to buy one.

Soy-Lime Roasted Tofu
Eating Well, March/April 2009

1 14-ounce package extra-firm, water-packed tofu, drained
1/3 cup reduced-sodium soy sauce (or tamari, if you need gluten-free)
1/3 cup lime juice
3 TBSP toasted sesame oil (you don't toast it, you buy it pre-toasted)

1.  Pat tofu dry and cut ito 1/2-inch to 3/4-inch cubes.  [Note:  I placed a double-thickness of paper towels under and above the tofu, and weighed it down with the Pyrex casserole dish I used for the marinade.  This extracted more water and gave it a better texture.]

2.  Combine the soy sauce, lime juice, and oil in a medium shallow dish or large sealable plastic bag.  Add the tofu; GENTLY toss to combine.  Better yet, just spoon the marinade over.

Marinate in the refrigerator for 1 hour or up to 4 hours, gently stirring once or twice.

3.  Preheat the oven to 450 degrees F.

4.  Remove the tofu from the marinade with a slotted spoon, and discard the marinade.  Spread out on a large baking sheet, making sure the pieces are not touching.  Roast, gently turning halfway through, until golden brown, about 20 minutes.

Saturday, May 12, 2012

Thank you, Mr. Daniels

What's odd?  It's my first Mother's Day Eve.  Odd because I don't have kids.  But my sweet 11-year-old niece has decided it's appropriate to cook for me tomorrow, bless her darling little heart.  Have I ever been so honored?  I doubt it.

Since I'm off the hook for cooking tomorrow (except appetizers), I busted it out on dinner tonight.  After a month or so of lackluster new recipes, HOME RUN with Tennessee-Whiskey Pork Chops.  Oh. My. God.  Tender, flavorful, they have a gravy - what's not to like?  As a side I made a high-maintenance corn casserole that isn't as good as my Scalloped Corn but is a hell of a lot more work, which violates my core kitchen values.

But anyway.  Tennessee-Whiskey pork chops are a little more work - but not much - than throwing pork in a pan.  And it's totally worth the effort.  The recipe calls for bone-in pork chops, but I thawed out half a pork loin and sliced it.  Of course, this decision was based on my highly experienced decision-making process of "it's what I already had in the freezer." 

Also, I didn't use a gallon-size ziploc bag because I'm making a genuine effort to use less one-use plastic.  I did the marinade in a glass Pyrex with a reusable plastic lid, and it worked fine.  Just turn the pork every 20 minutes or so.

The recipe notes that while any whiskey will work, they REALLY like Jack Daniels in this.  I have no reason to argue.  Y'all, this is a publication that debates the merits of one brand of baking soda over another (????), so if they say JD is the best I have no reason to doubt them.  I bought a pint and a half or some such small bottle for less than $10 at the package store, and it was only a dollar or two more than a lesser libation would've been.

Also, I'm going to cut the brown sugar the next time I make it.  It was a little too sweet for me - but then again, most things are.  Your mileage may vary.

Enjoy.  I'm not giving you the recipe for the low return on investment corn casserole I made, but I do recommend scalloped corn on the side.  Regular corn on the cob would also be terrific, especially with a green salad.  Oooh, and mashed potatoes, or mashed sweet potatoes, would TOTALLY rock with this sauce.

Tennessee-Whiskey Pork Chops
Cook's Country

1/2 cup Jack Daniel's Tennessee whiskey or 1/2 cup bourbon
1/2 cup apple cider (juice will work, but cider is better)
2 TBSP light brown sugar
1 TBSP Dijon mustard
1/8 tsp cayenne pepper
1/2 tsp vanilla extract (I KNOW.  But it works)
4 tsp cider vinegar, divided
4 bone-in, center-cut pork chops, about 1 inch thick (I sliced some boneless pork loin instead)
2 tsp vegetable oil (divided)
Salt and pepper
1 TBSP unsalted butter

1.  Whisk whiskey, cider, brown sugar, mustard, cayenne, vanilla, and 2 teaspoons vinegar together in medium bowl.

Transfer 1/4 cup whiskey mixture to gallon-sized zipper-lock plastic bag, add pork chops, press air out of bag, and seal. Turn bag to coat chops with marinade and refrigerate 1 to 2 hours.  Reserve remaining whiskey mixture separately.

2.  Remove chops from bag, pat dry with paper towels, and discard marinade.  Heat oil in large skillet over medium-high heat.  Season chops with salt and pepper and cook until well browned on both sides and a peek into thickest part of a chop using paring knife yields still-pink meat 1/4 inch from surface, 3 to 4 minutes per side.  Transfer chops to plate and cover tightly with foil.  [Really do cover tightly with foil.  The pork stays so much more moist and tender than if you let it steam into the air.]

3.  Add reserved whiskey mixture to skillet and bring to a boil, scraping up any browned bits.  Cook until reduced to thick glaze, 3 to 5 minutes (mine took more like 7).  Reduce heat to medium-low and, holding onto chops, tip plate to add any accumulated juices back to skillet. 

Add remaining 2 teaspoons vinegar, whisk in butter, and simmer glaze until thick and sticky, 2 to 3 minutes.  Remove pan from heat.

4.  Return chops to skillet and let rest in pan until sauce clings to chops, turning chops occasionally to coat both sides, and a peek into thickest part of a pork chop using paring knife shows completely cooked meat (145 degrees on instant-read thermometer, which I HIGHLY recommend you own for $10 to $15).  Transfer chops to platter and spoon sauce over.  Serve.

Sunday, March 4, 2012

Do what with the what, now?

Since Sweetie got me to start eating pork ten years ago - mostly because he couldn't face ONE MORE piece of chicken - I've developed a fondness for roast piggie.

It's similar to the wonderful Chili Glazed Pork Roast, but my hand to God I've never heard of leaving a defenseless, uncovered roast open to whatever vagaries happen behind a closed refrigerator door. Weird. And suspect.

But, you know, it's not a good idea to close myself off to learning new things. I'd hate to still be making the same stuff, the same way, twenty years from now.

ANYHOODLE, if you haven't introduced yourself to smoked paprika, it would be well worth your time to do so. A pinch in homemade salsa, a quick shake over chicken, a hearty dash in a taco soup - deeeeelish. It gives a great smoky flavor for relatively little expense.

That's the poorly-kept secret behind this dish. Praise be my Southern climate allows me to keep fresh herbs (thyme and rosemary in particular) growing on my deck all year long, as there's really nothing like fresh thyme.

I was really hesitant - my face nearly froze that way - about putting an uncovered, herb-plastered roast in my refrigerator. Overnight!!! Honestly, it was no big deal. The reason behind this quirky approach is that the flavoring will dilute in trapped moisture if you wrap the roast. That being the case, if you've got a huge fridge with tons of room you could put the roasting pan inside a sideways paper bag to shield the roast and let the paper absorb any moisture. But, as possible evidence of my learning something, it was no biggie.

Our friends at Southern Living, who developed this recipe, also called for a Sticky Stout Barbecue Sauce to go with it; recipe here. I didn't try it so you're on your own with it, but the pork recipe was so fab I wouldn't expect the sauce to be anything less.

To fully cover the roast with the herb mixture you have two options - and many more if you're willing to utilize dart guns. Either spread the mixture on a length of waxed paper, roll, and deposit the now-coated roast in a pan, or (my method) put 1/4 of your herbs in the bottom of the roasting pan, place the roast on top and press, then use a large spoon to sprinkle/press the rest of the herbs on.

Sweetie might have mentioned 3 or 4 times - during dinner - that he really liked this recipe a lot. I served it with steamed broccoli and a quick cheese sauce (some evaporated milk I had open, a little faux flour, a squirt of Dijon mustard, a shake of hot sauce, and some grated cheddar).

Smoked Paprika Pork Roast
Southern Living, October 2011

2 TBSP smoked paprika
2 TBSP brown sugar
1 TBSP kosher salt
1 garlic clove, pressed
1 tsp coarsely ground pepper (Seriously? About 10 twists of the grinder. Jesus. Nobody measures that.)
2 tsp chopped fresh thyme
1 (3 1/2- to 4-lb) boneless pork loin roast

1. Stir together paprika, brown sugar, salt, garlic, pepper, thyme. Trim pork roast - meaning "cut off the big ol' pad of fat."

2. The recipe says to tie the roast. If you're into kitchen macrame, have at it. I chose to pretend I didn't see that part.

3. Place in a roasting dish large enough to hold roast. I used a smallish pan for my smallish roast, because arthritis means I can't waste my hand strength on lifting roasting pans heavier than they need to be. HOLLA.

4. SL's directions are for grilling - light one side of the grill, heating to 375 to 400 degrees; leave other side unlit. Place pork over lit side, 8 minutes on each side or until browned. Transfer pork to unlit side and grill, covered with lid, 35 minutes or until a meat thermometer registers 160 degrees.

5. My directions - roast at 325 degrees for 45 - 60 minutes, or until a meat thermometer inserted in the thickest part of the roast registers 160 degrees.

6. If yours turns out like mine did, it may look a little leathery on the outside. I told it to shape up during its 10 minute rest period (you really do need to do this, to let the meat re-absorb juices). It wasn't as juicy as the Chili-Glazed pork, but it was fab and intensely flavorful.

Saturday, January 21, 2012

And the 2012 word is.....

People who are way more serious about blogging than me - probably because they're much better at it - decided they'd all choose a word for 2012. Something that embodies a goal, something that speaks to a quality to develop.

I was specially invited - as an adult who can read and write in English - to participate. See if you can figure out my goal from the following:

a) I'm eating leftovers for dinner.
b) I went to Lowe's today and didn't buy one.single.thing.
c) Tomorrow should be the last day I have paint splatters on my nails.

Possibly, you were thinking along the lines of being a cheap-ass frugal as a worthy 2012 goal. And indeed it is, and it will probably be a by-product of my actual goal... which is to FINISH what I've started.

I'm surrounded by projects that range from too-started-to-pretend-it-isn't to done-except-for-the-last-15-minutes-that-would-make-the-already-invested-14-hours-really-be-worth-it. Is anyone nodding their head in agreement?

What does this "finishing" mean?
1. I have materials and I have plans. Those both need to make sweet, sweet love and become A Thing. For example - I have 4 Goodwill picture frames for prints I've purchased over the years. It's time these crazy kids got together, spray painted or whatever, and decided to hang out on my wall. Any wall. I'm not picky (much).

2. I throw out too much food - hence the leftovers as part of my sly teaser above. I need to FINISH what I cook. Good for the wallet, good for the earth. Sorry, but it's true - and in fact, it (curried chicken with brown rice) was delicious.

3. I'm REALLY looking forward to a time, probably not in the near future, but someday, when I can come home and not have a pile of Projects To Do all over the place, making me feel guilty and tired just by looking at them. Probably wishful thinking, but I can at least do better than I am now.

All that said, what - says the food blogger - is something I DID finish? Well a few things, actually, including a great end-table for our living room that gives much-needed storage, and this terrific frittata.

It was in Fitness magazine (which I finished reading all the way through, thank you) in September, 2010. And I finally got around to making it two weeks ago. Unlike other frittatas there are no potatoes, so it's a little more of a crustless quiche.

The best part is its adaptability. I try to get at least 10 different vegetables into our diet per week, so the asparagus here was perfect. I also added some sauteed country ham bits.

Variations to substitute for all the veggies:
Sundried tomatoes, spinach, and mushrooms (season with oregano). Mozzarella will work; personally, I love goat cheese with sundried tomatoes. Decadence!
Extra mushrooms (sauteed) and thyme (fresh if possible), maybe some smoked gouda
Corn, black beans, cumin (1/2 tsp, maybe?), cheddar or pepper jack instead of goat cheese, and a little hot sauce or chili powder

Kitchen Sink Frittata
Fitness magazine

6 eggs
6 egg whites
1 cup skim milk
1 cup sliced mushrooms
4 stalks asparagus, cut into 1- to 2-inch pieces on the diagona
2 cups arugula (or spinach)
2 ounces crumbled goat cheese

Preheat oven to 375 degrees.

Whisk together eggs, egg whites, and skim milk.

Mist a 10- or 12-inch ovenproof skillet with nonstick cooking spray. Sautee mushrooms, asparagus, arugula (or spinach) until veggies are tender, about 5 minutes.

Pour egg mixture over the top - don't stir - and sprinkle with goat cheese.

Bake for 20 minutes until golden.


The Lettered Cottage

Monday, January 9, 2012

Choppin' Broccoli

Back in the 80s we entertained ourselves with hair spray, some fantastically happy dance music, VHS tapes, and this little Saturday Night Live snippet:

http://www.hulu.com/watch/4195/saturday-night-live-derek-stevens-chopping-broccoli

Because if you're going for a big recording contract, you'd better bring it with the broccoli, yo.

The past few months have been rough and I could use some happy dance music, or happy anything, right about now. [brings back of hand to forehead, sighs dramatically] So thank goodness a) we have a radio in the kitchen and b) I've suddenly remembered that the kitchen is more than "the place where I keep the bananas."

TWO NIGHTS IN A ROW we had a real dinner at home (and I had the third at Cutie's house). We faux-breaded trout and had - did you notice the foreshadowing? - roasted broccoli. The original intent was to try a fab-looking recipe for broccoli & sun-dried tomatoes, but I pulled off a trifecta of forgetting to get sun-dried tomatoes for three consecutive shopping trips. [blushes modestly].

Having established already that broccoli and tomatoes go together, and that Parmesan goes with both broccoli and tomatoes, and there was half a container of cherry tomatoes that had about 6 hours of usability left, I halved the tomatoes and threw them in. I'm going to call it 1 cup in the recipe but, really, any amount (or none at all) will work.

ROASTED BROCCOLI AND TOMATOES WITH PARMESAN
based on Ina Garten's Parmesan-Roasted Broccoli

2 or 3 heads of broccoli - 2 pounds-ish
2 garlic cloves, peeled and thinly sliced
Salt & pepper
1/3 cup freshly-grated Parmesan cheese (yes, freshly grated. It is one of life's true and affordable pleasures to have fresh Parmesan and not the parmesan dust in the green can. Trust me.)
1 cup halved cherry tomatoes or grape tomatoes

1. Preheat oven to 425 degrees
2. Cut the head(s) of broccoli into clusters of florets, leaving an inch or two of stalk attached.
3. Put the florets on a baking sheet large enough to hold the broccoli, garlic, and tomatoes in a single layer. Drizzle 1 TBSP vegetable or olive oil over the veggies & garlic - toss to coat all veggies [2 notes - first, I usually line the pan with aluminum foil for faster clean-up. Two, combining oil and veggies is easier in a smallish bowl than on a big baking sheet. It dirties another dish, but it does a much better job of coating the vegetables so that they don't burn.]
4. Sprinkle with salt and pepper.
5. Roast for 20 - 25 minutes, until florets are crisp-tender. They will be a little browned.
6. Remove the baking sheet from the oven and toss veggies with Parmesan. A sprinkle & a stir, then again, then again helps distribute the Parmesan and keeps it from melting into clumps.

We had this with fish, but it would work well with chicken, pork roast or pork chops (especially if they have oregano), or pasta with red sauce. Enjoy!

Wednesday, September 28, 2011

It Would Be Worth It

It's tradition in my office for me to bake a cake for any number of occasions. This wasn't my idea, but office harmony is worth a few cakes as far as I'm concerned.

One such occasion was yesterday. Over the years I've learned to just bring the frosting to the office and frost there. Trying to transport a decorated (ha!) cake brings me to the verge of breakdown. Not that transporting cake, frosting, and all my crap on the train is any picnic, but still.

The cake almost didn't make it yesterday. It's not that I nearly dropped it, it's that I nearly offered it to a fellow passenger if he would promise to never, ever again wear socks with flip-flops. But I restrained myself....

The requested carrot cake was a hit. No one in my office is on Weight Watchers, so far as I know, I just used the recipe because it's the best carrot cake recipe I've found. It's not health food, but it's not nearly as waistline-impacting as regular carrot cake. And it's FAB!

Carrot Cake
Weight Watchers magazine, 2006

2 cups all-purpose flour
1 1/2 cups sugar
2 tsp cinnamon
2 tsp baking soda
1 tsp salt

1/2 cup dried apricots
3 TBSP hot water

2 large eggs
2 large egg whites
4 large carrots, shredded (2 1/2 cups) - DO NOT use bagged, pre-shredded carrot. It will be way too dry.
1/2 cup apple butter
1/3 cup canola oil

12 oz. light cream cheese (Neufachtel)
One 7.5 oz. jar marshmallow fluff (I could only find 7-oz. jars - it worked fine)

Preheat oven to 350 degrees.

Spray two 9-inch round cake pans with cooking spray, line the bottoms with parchment or wax paper, and spray the paper.

Combine the flour, sugar, salt, cinnamon, and baking soda in a bowl.

Put the apricots and hot water in a food processor (I use a mini-chopper) and process until finely chopped and well combined.

Whisk the eggs and egg whites together. Add carrots, apple butter, oil, and apricots, stirring until blended. Spread the batter evenly in the pans. Bake until nicely browned, 30 - 32 minutes. Let cool in the pans for 15 minutes, then remove from pans, remove paper, and cool on wire racks.

To make the frosting, combine the marshmallow fluff, cream cheese, and vanilla (I also throw in a dash or two of cinnamon) with an electric mixer on medium speed.

Sunday, September 25, 2011

What I Did Over My Summer Vacation

I embraced the Staycation. There's a lot to be said for sleeping in, having a leisurely breakfast, and taking a stroll through the gorgeous Botanical Gardens. They've set up an edible garden with an outdoor kitchen for cooking classes (cough, SHOW-OFFS, cough). Seriously, props to the Gardens for growing a tremendous amount of produce and donating it to the Atlanta Food Bank.

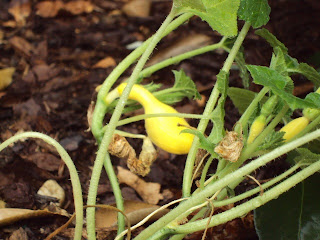
Might I mention that we got 3 tomatoes, numerous baby squash (they never grew to full-size - why????), and a decent array of herbs from our own patch o'dirt? And yes, I know I should compost. I KNOW. But if I take on one more ongoing responsibility I. Will. Scream.

It was also the summer that Friday became PieDay. Sweetie (my hubs) and Cutie (our niece) share a deep and abiding love for pie. [Note: Cutie has been known to climb in my car and say "What's for pie?"] Sweetie makes some seriously kick-ass pie due in no small part to having learned from his grandfather, a chef. Cutie is an enthusiastic apprentice. Their preferred Key Lime Pie recipe will be a future post.

My own favorite recipes, at least for weeknights, are those that don't require a lot of work. Sorry if that takes the blush off the rose for a cooking blog, but there you have it. There's still some decent corn on the cob out there - enjoy!

And a big shout-out to this fab website that tells you what fish you can substitute for what other fish. This is particularly helpful if you're trying to eat locally or, like me, trying to substitute something - anything! - for the $19/lb fish some recipes call for.

www.fish4fun.com/fish.htm

Flounder With Corn & Tomatoes
Good Housekeeping, September 2011

Makes 4 servings (recipe is easily halved or doubled)

2 c. fresh corn kernels (plan on 1/2 to 1 ear per person) - for presentation, I prefer yellow corn to white for this recipe. It adds a nice contrast with the greens and the white fish.

1/4 c. sun-dried tomatoes, chopped (call it half a handful for 2 people)

1 tsp. freshly grated lemon peel (I wasn't buying a lemon just for this. I used a squirt of bottled lemon juice)

4 (3-oz.) skinless flounder fillets

1 small leek, white part only, well-rinsed, cut into matchsticks (they were crazy-expensive at the Farmer's market, so I subbed in regular green onions/scallions. Don't substitute regular onion, it will be too strong.)

4 sprigs fresh thyme (yay! my garden!!!!). A light sprinkle of dried thyme will also work.

8 tsp. dry white wine

2 tsp extra virgin olive oil (don't buy olive oil just for this recipe. Use it if you have it but if you don't, regular canola or vegetable oil will work just fine)

8 oz. spinach (2 handfuls per person)

1. Preheat oven to 450 degrees F.

2. In bowl, mix corn, tomatoes, peel (or juice), and a dash of salt & pepper.

3. On 12" by 15" or parchment or foil (either will work great - I used foil), arrange 1/4 of the vegetables (or 1/2 if you're cooking for 2) on 1 side. Fold 1 fish fillet into thirds (if it's large; mine were small, so I laid them flat). Place on top of corn/tomato mixture.

Top with 1/4 of leek, 1 sprig thyme, 2 teaspoons wine, 1/2 teaspoon oil, and a pinch of salt. [Much easier - combine leek, wine, and oil and just divide it evenly over the packets of fish.] Fold the other side of the parchment or foil over the fish. Starting at 1 corner, fold edges over 1/2 inch all around, overlapping folds until sealed.

[Note: Be sure to leave enough room in the packet for steam. The steam is what cooks the fish & veggies and the fish comes out fabulous moist and beautifully cooked. If the packet is too tightly wrapped it may pop due to the pressure from the steam. And in that case, neither "fabulous" nor "beautifully" applies.]

Repeat to make remaining packets. Bake, on a cookie sheet or jelly roll pan, 15 minutes.

4. Place spinach in glass bowl; cover with damp paper towel. Microwave on High 2 minutes or until wilted. [I check it every 30 seconds].

5. Open packets; serve with spinach.

Sunday, June 12, 2011

Workin' It

All of it. The land, the bod, the freezer. Not necessarily in that order.


The pressure is on, because I got rid of all my bigger-size clothes so now I have no choice but to eat gruel for breakfast. Occasionally, I splurge on a raisin.


So far, the 2011 harvest does not look like it'll recoup the cost of the plants, but that's OK. I love seeing this baby squash right now -


And the tomatoes....


Aaaahhh, summer! We're also workin' some thyme, basil, and rosemary.


As for the freezer, this little concoction is FAB. If you have kids, or 95-degree weather, this is a good one to do with them since there's no stove involved. Can I get an amen?


From Clean Eating magazine:


1 baked pie crust


5 small, ripe or slightly overripe bananas


1 tsp vanilla extract


1 cup light coconut milk (this is different from coconut cream, which is thicker and much sweeter)


1/4 cup cocoa powder (I used dark cocoa, because that's what I have. Regular works fine).


Optional - chopped peanuts


1. Peel and slice bananas.


2. Add banana pieces, vanilla extract, coconut milk, and cocoa to the jar of a blender. Puree, stopping to scrape down the sides every so often.


3. Pour the banana puree mixture into the pie shell - sprinkle peanuts on top if you wish. Wrap tightly with plastic wrap and freeze at least 4 hours.


4. Put pie in refrigerator for at least 30 minutes before serving.

Friday, March 18, 2011

Everything's Coming Up Roses

Tulips, actually. My favorite.

When I experiment I don't want to risk dropping $15 on one recipe, you know? For a while I've wanted to throw a whole chicken in the crockpot, but what if it tasted like sauteed latex? With a side of whatever food poisoning comes from chicken? Or worse???

[Side note - never, ever ask an imaginative person "What's the worst that can happen?" It doesn't give us perspective. It's an invitation to roam over wild idea pastures and peek under Scary Story rocks. Not good.]

Anyhoodle, the other night I was at the gym getting my gluteus more minimus and ran (As if. I drove.) over to the Publix right afterwards.

Anyhoodle again, they had started marking down the perishables that were still good but had overstayed their welcome. YES. I grabbed a roasting chicken for $3.32.

And that, my friends, is a chicken to take chances with. To throw caution to the winds, to wrap in nontraditional spices, to allow a wine flirtation.

Can you tell I don't get out much at this time of year?

The chicken was terrific. So good, in fact, I would even spend real money for the chicken next time, and I don't often throw that phrase around. I CAN'T WAIT to get the stock from this little gem.

[Speaking of stock, this is GENIUS. Get a gallon-sized Ziploc bag. Write "Stock - No Broccoli" on it. Keep it in the freezer and add whatever vegetable trimmings you have - green bean ends, onion ends, carrot ends, etc. and no broccoli or brussels sprouts - as you create them and save them for making stock. So take THAT, Miss Nine-Year-Old "you can compost that."]

Many thanks to Food.com for this one. I used kosher salt, which turned out fine. If you're using regular table salt take it down to 3 teaspoons.

Whole Chicken Crockpot Recipe
Food.com


Ingredients:


  • 4 teaspoons salt

  • 2 teaspoons paprika

  • 1 teaspoon cayenne pepper

  • 1 teaspoon onion powder

  • 1 teaspoon thyme

  • 1 teaspoon white pepper (why white? No idea. I don't have any.)

  • 1/2 teaspoon garlic powder

  • 1/2 teaspoon black pepper

  • 1 large roasting chicken

  • 1 cup chopped onion (optional)

1. In a small bowl, combine the spices.

2.  Remove any giblets from chicken.

3.  Rub the spice mixture on the chicken.  If you're prepping way in advance you can cover with plastic and refrigerate overnight... but that's not usually the case in this house.

4.  Put chopped onion in the bottom of the slow cooker, place chicken on top.  No liquid is needed.

5.  Cook on low for 4 - 8 hours.

Sunday, January 30, 2011

A Loaded Question

Now that I'm doing this menu planning thing, I have a whiteboard magnetized onto the fridge with a list of dishes we'll have in the upcoming week, assuming no one gets raptured up. You never know.

I came across this recipe while perusing the Eating Well website. Healthy this, tasty that, quick, etc. Having a total of 5 nieces & nephews, I took a look at the kids' section and jeez, what do people pack in lunch boxes these days??? Broccoli, ham, and pasta salad? Well, color me surprised if it doesn't end up in the trash can.

The kids' dinner recipes looked much more realistic, and I HAD to try to Loaded Baked Potatoes. I made them with sweet potatoes and they were fab. If I were making this on a weeknight I'd probably skip the ground meat and just throw in some diced sandwich ham.

Loaded Twice-Baked (Sweet) Potatoes
Eating Well

4 medium russet (baking, or "Idaho") potatoes - or sweet potatoes
8 ounces 90% lean ground beef (I used ground turkey breast)
1 cup broccoli florets, finely chopped
1 cup water (I used maybe 1/4 cup)
1 cup reduced-fat Cheddar cheese, divided
1/2 cup reduced-fat sour cream
3 scallions (green onions), sliced

Pierce potatoes all over with a fork. Cook in microwave on Medium for about 20 minutes (I was baking anyway and just wrapped my potatoes in foil and threw them in the oven). Or use the "potato" setting on your microwave and follow the manufacturer's direction.

Brown ground meat in a skillet over medium-high heat, stirring often. Transfer cooked meat to a small bowl and set heat on high. Add broccoli florets and water, then put the lid on the skillet - broccoli should steam in 4 minutes or so. Drain the broccoli and add to the meat.

Cut off the top 1/3 of the potatoes and reserve for another use. Scoop out the insides into a medium bowl, and put the potato shells in a baking dish. Add 1/2 cup of cheddar, sour cream, salt, and pepper to potato innards and mash. Add scallions and potato mixture to the broccoli and meat; stir to combine.

Fill potato shells with tasty mixture and top with cheese. Heat in microwave until the cheese melts.

Monday, January 17, 2011

This Army Runs On Her Stomach

This is my busy time of year professionally - well, one of them, anyway. Gotta bring the A-game every day. Gotta not get sick. Gotta think on my feet. Gotta not yell. Gotta gotta.

So what's a girl to do? The magic wand is always "out of stock", Superwoman capes don't match ANY of my suits (some fashionista get on that, please. Call me.), and I have yet to find a way to get professional credit for being a good doggie-mama. Oh, the challenges of the modern woman!

For a few months our better dinners will be on the weekends [actually, that's always true, but the disparity between Weeknight and Weekend is a little more pronounced]. I was cruising through some recipes I wanted to try and came across a sassy little Ellie Krieger number for Jerk Chicken with Cool Pineapple Salsa.

Never content to cook off the rack, I applied my own tailoring. Specifically I substituted tilapia for chicken and bottled jerk sauce for homemade. I had been an unsuspecting victim of a nap attack and, well, time and energy weren't my thing just then.

YAY for me, I had made the pineapple salsa the day before. That actually worked out better for the recipe, since it gave the flavors time to meld and the mint mellowed nicely. I had my doubts about the salsa initially, but the cooling off period worked great and we were able to have a healthy relationship. In fact, we may meet again (leftovers) with salmon tomorrow.

The pineapple salsa recipe is Ellie Krieger's; the rest of it is my daring improv.

JERK TILAPIA
3 or 4 tilapia filets (I used the frozen pack from Trader Joe's)
1/4 cup jerk sauce (Atlantans, mine was from DeKalb Farmer's Market)
2 TBSP oil, plus oil for the broiling rack

1. Move oven rack to the center of the oven. Neither fish nor sweetened sauces like to be too close to the heat.

2. Wipe down your broiler pan or rack with an oiled paper towel. This works better than cooking spray.

3. In a small bowl stir together oil and jerk sauce. Olive oil is going to give you an off flavor - vegetable, safflower, or canola oil is a better bet.

4. Place fish on broiler pan/rack and brush with oil and sauce mixture.

5. Broil for 4 minutes on each side.

COOL PINEAPPLE SALSA
1 TBSP honey
1 TBSP lime juice
1 cup finely diced pineapple
1/3 cup finely diced, seeded English cucumber (I used regular cucumber and seeds are fine with me)
1 TBSP chopped fresh mint leaves (yes, fresh - you can also add them to ice water for a terrific refresher)

Combine all. Store refrigerated.

Saturday, January 15, 2011

New Year Halo Effect

Let's see.... linen closet organized, healthful snacks, regular workouts. Yup, it's the New Year Halo Effect. And at 41, I'm too cynical to think I can bring this do-goodery and do-wellery back to life at regular intervals throughout the year. I'm totally going to try to keep my kick-ass linen closet in shape, though.

Atlanta had apocalyptic ice this past week. I suspect that our city's snow removal plan includes the phrase "...then the next day, it melts and life goes on." Which is true 95% of the time. HOWEVER. My neighborhood was unpassable - by car - for several days and I finally busted out on foot without busting anything. Yay, yoga balance drills! As my friends on Facebook know, I really did walk 2 1/2 miles in the snow and ice, uphill both ways. [pssst - totally overrated]

But before "cozy" became "claustrophobic" we had this simple, tasty entree one evening. It's not often that Sweetie gives an emphatic "YUM" on the first bite, but this one rated it. I grabbed some "fish in a bag" flounder at the local supermarket for just about $5. Obviously I'll be getting more.

This is SO easy to throw together on a weeknight and any vegetable(s) will make a good side dish.

Deceptively Easy Fish
2 TBSP lemon zest
1 TBSP olive oil
Salt & pepper to taste
2 cloves garlic, crushed
6 pieces flounder, tilapia, or similar (the FIB flounder pieces were small, so plan on 2 or 3 for each adult)

Combine lemon rind, olive oil, salt & pepper, and crushed garlic. Allow to sit for 15 minutes or longer for the oil to absorb the flavor.

Preheat oven to 425 degrees.

Spray baking sheet with cooking spray (I just used baking parchment, it was fine). Put fish on sheet and brush with oil. Bake for 8 minutes or until fish flakes. Serve immediately.

Saturday, January 1, 2011

Dressing Up

Tech Girl joined us for Christmas dinner a few weeks ago; we used the Emeril's Caribbean Chicken recipe for turkey and OH MY GOD. It was amazing, and the resulting turkey stock even more so.

Since we've been roasting chicken lately, I needed to dress up the side dishes a little. Plain roast chicken and plain steamed veggies - even if a nice glass of wine is also part of the deal - is just a little austere. Enter Clean Eating (Eating Clean?) magazine - not my usual purchase, because of their use of more ingredients (e.g. "teff flour") than I care to inventory in my kitchen. But they had this keeper of a veggie dish.

Sauteed Green Beans & Carrots with Dill and Horseradish

1 tsp olive oil
1 medium shallot, finely diced
3/4 lb green beans, trimmed (cut in half, if very long)
2 medium carrots, peeled and julienned
1 large orange, zested and juiced, divided
6 - 8 sprigs fresh dill, chopped - about 2 tbsp (I skipped this part)
1- to 2-inch piece horseradish root, peeled and freshly grated (nope - it was way pricey), or 2 TBSP all-natural prepared horseradish (that's more like it)
Salt and fresh ground black pepper, to taste

Heat oil in a large saute pan over medium-high heat. Add shallot, beans, and carrots and saute, stirring often, until tender (3 - 4 minutes).

Add orange juice to pan and stir once. Cover pan with lid and steam for about 2 minutes. Remove pan from heat, add orange zest, dill, and horseradish. Season with salt and pepper. Serve immediately.

Thursday, November 25, 2010

Nothing Short of a Snacktime Revolution, I Tell You

So it's Thanksgiving Day (have a Happy!), you've read 18 different turkey recipes and seen one too many perky skinny person talk about how they actually lose weight over the holidays. Dinnertime isn't when it usually is. You may be at the home of "that aunt" - the one with the feral cat collection and the off-limits basement. Or, you may be having a perfectly lovely holiday with good friends and loved ones and tasty treats - good for you.

In any event, one of this year's losses was my favorite not-very-salty, fancy-foofy microwave popcorn from the International Organic Artisinal Free-Range Yummy Store. It has been counterbalanced by one of this year's successes.

And by that I mean "popcorn in a paper bag." My new blogcrush, Cheaphealthygood, has a terrific post on making regular, plain ol' cheap popcorn in a regular, plain ol' cheap paper lunch bag.

One quarter-cup popcorn kernels.
Place in paper lunch bag and fold over top.
Put in microwave for 4 minutes. Stop microwave when rapid popping stops.

That sound you hear is the money climbing back into my wallet since it's not going to Yummy HQ in exchange for popcorn. For that, I'm thankful.

Happy Thanksgiving!